
Wow! Can you believe it’s that time of year again? Our children our gearing up go to back to school! I have to admit, I have had Bunbun’s school supplies purchased and ready to go for a few weeks now. Her uniforms came in last week and all she needs is new sneakers. I honestly am not ready to send her back just yet. Can we just have a few more weeks? Months even? We have really been enjoying one another, keeping busy and spending time with friends. But, I guess we can’t keep them home forever, right?
Download My Photoshop Template Here
Download My Blank Template Here
(For PicMonkey users)
After you’ve downloaded my blank template, you’ll need some fonts! As most of you already know, I am a font hoarder and I am not afraid to admit it! I get the vast majority of my fonts from DaFont.
Below is a handful of my favorite fonts, along with their links to download. All of which are free for personal use.
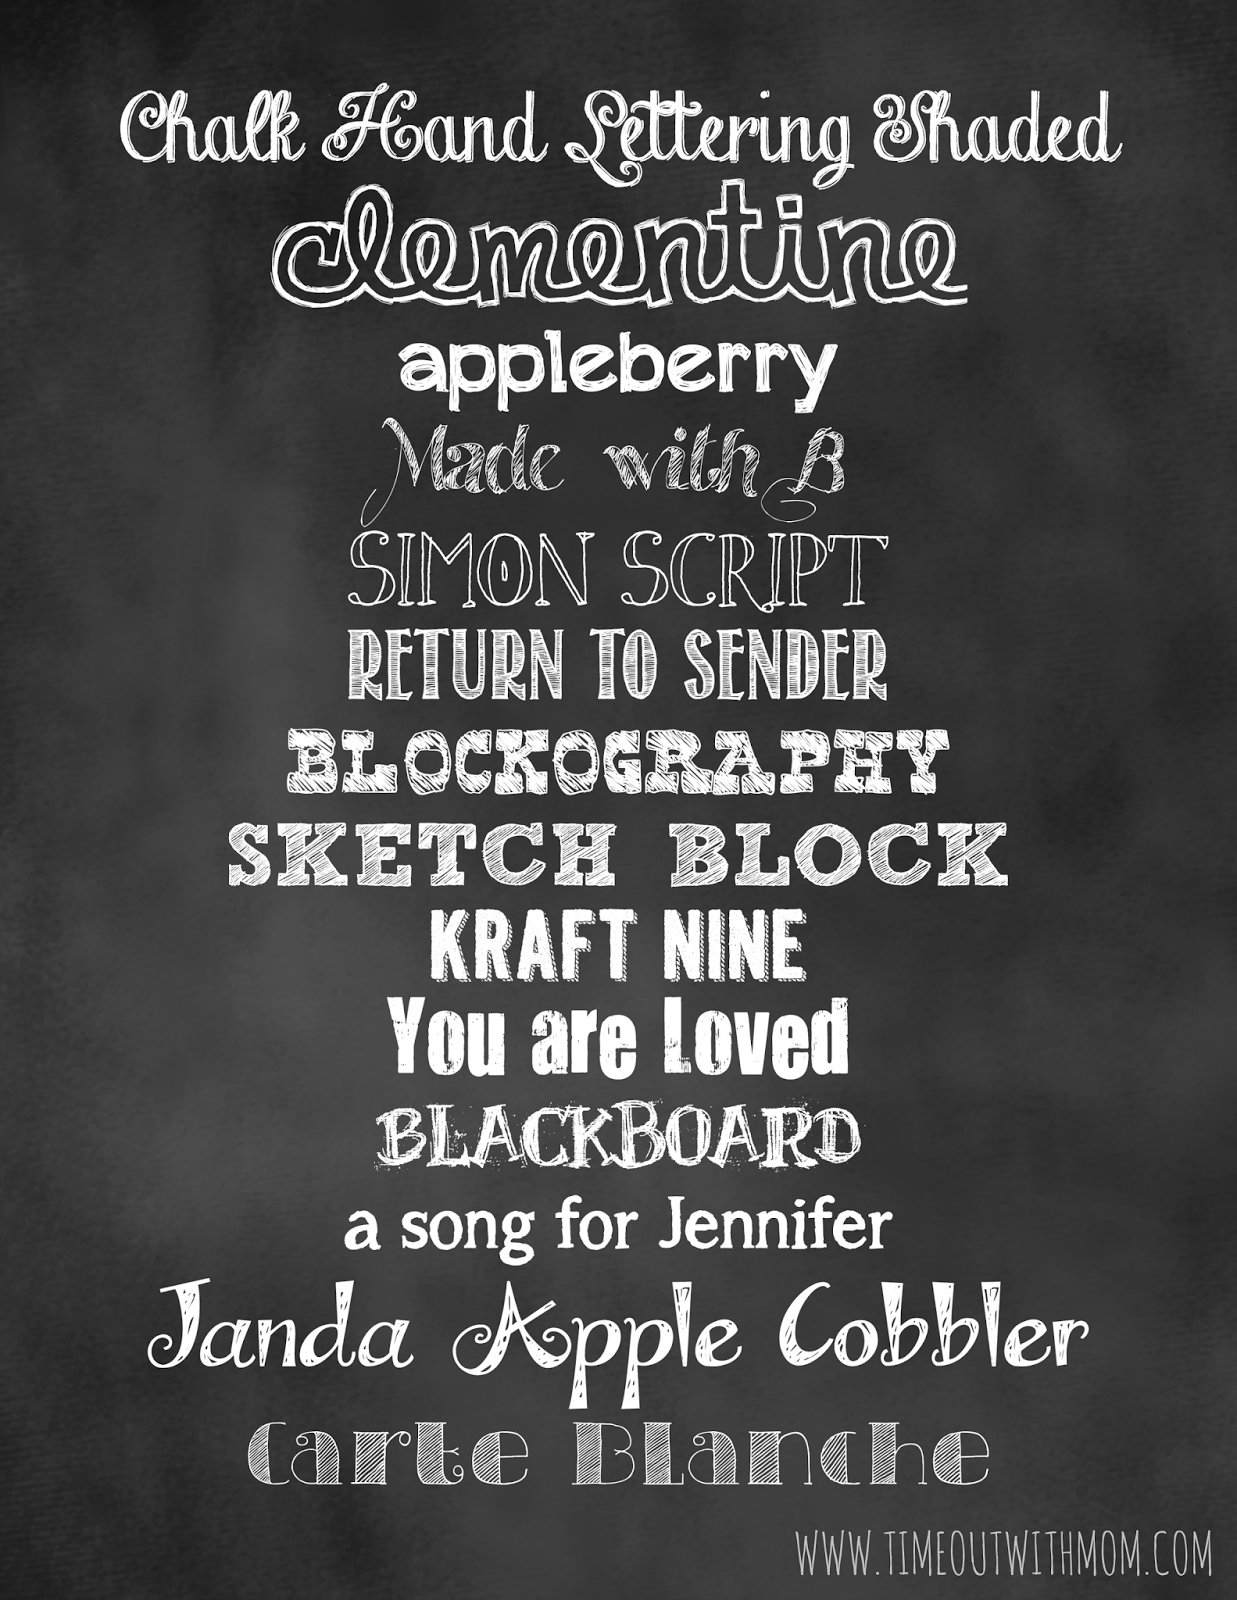
Clementine
Appleberry
Made with B
Simon Script
Return to Sender
Blockography
Sketch Block
Kraft Nine
You are Loved
Blackboard
A song for Jennifer
Janda Apple Cobbler
Carte Blanche
Now that you have everything you’re going to need, the following steps will assist you with PicMonkey.
- Select ‘Edit’ on the top menu bar and open the blank template.
- On the left side, you will see a vertical toolbar. Click the ‘Tt’ which is for adding and editing text.
- Choose your font from the list. If you’d like to use the fonts you have just downloaded and installed, select “Yours” to display your full font library.
- Once you have chosen your font, click ‘Add Text’.
- Type whatever you’d like and feel free to adjust your sizing and move your wording around. Add as many texts boxes as you need! When you place another word or phrase onto your document, it will show in a separate box. To move those words or items around again, just click on the word, phrase or dingbat and you should be able to move and/or re-edit that portion of your image.
- When you are finished with your design, click save at the top.
- Enter the file name you’d like to use (leave it on .jpeg)
- Select your quality. I usually use ‘Sean’ because the quality is great and I don’t mind the larger file size.
- Finally, click the green ‘save to my computer’ button and save!
- Print on the First Day of School and Share!
I hope you enjoy making your first day of school signs, and please feel free to share them with me! I’d love to see all of your little ones gearing up for the new school year!
If you have any questions, please feel free to ask. I am always more than happy to help!
Need help installing your fonts? Here’s some help!
Click Here for Windows
Click here for Mac
Note: When using PicMonkey, saving a .jpeg as ‘Sean’ quality will give you the maximum resolution output, but please be sure to check your upload with the photo lab to ensure there are no resolution warnings/alerts before sending your file to print.
Note: Printables/Images are for personal use only. Not for resale.


[…] Time Out With Mom | Back to School Sign […]